Blog
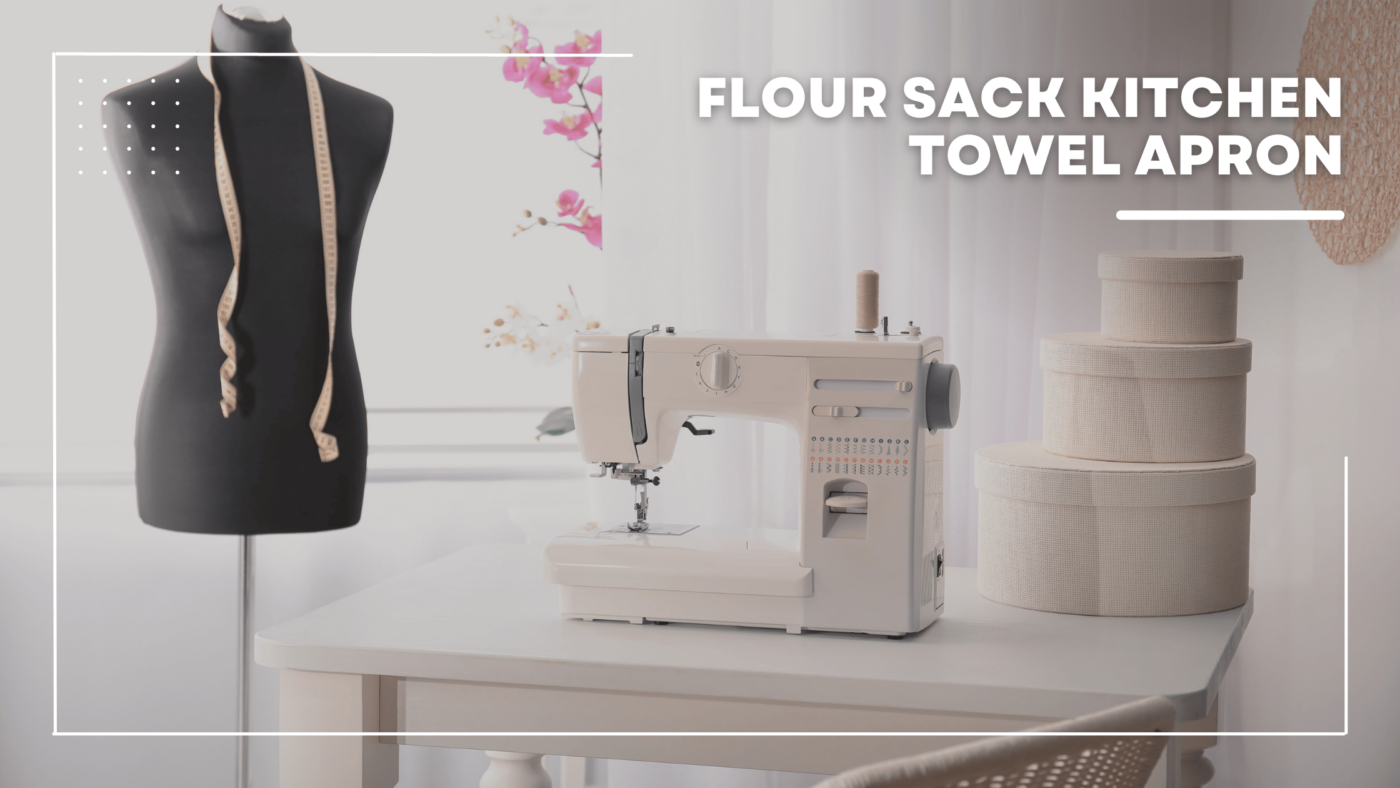
How Do You Make An Apron Out Of A Flour Sack Kitchen Towel?
Mar
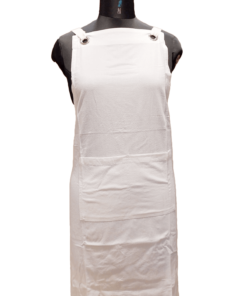
Have you ever wanted to experience the thrill of making something out of nothing? Do you have an old flour sack kitchen towel that’s been collecting dust in your closet for years with no use at all? Well, prepare to be amazed! Contrary to popular belief, it is possible to turn a useless flour sack kitchen towel into something extraordinary: a stylish and practical apron. Who knew such beauty could come from so little?! Read on to learn how to make an flour sack apron out of a flour sack kitchen towel – it’s easier than you think.
The first step when creating this unique piece of apparel is gathering materials. All you need is one large-sized flour sack kitchen towel, thread, scissors, pins, and either a needle or sewing machine. Once these items are gathered together, it’s time to start crafting!
Next comes the fun part: cutting and shaping the material. Stick pins around the edges of the towel in order create two holes – one will serve as neck hole and the other will act as waist tie – then cut along these pinned lines. This should leave you with two separate pieces which can now be shaped further by trimming excess fabric away until desired shape has been achieved. You’ve just made some serious progress towards having yourself an awesome new item of clothing – congrats!
Definition Of A Flour Sack Kitchen Towel
A flour sack kitchen towel is a white linen cloth made from 100% cotton fabric. It can be used for baking, cooking and cleaning. The towels are usually plain in color with no designs on them, although some may have prints such as stripes or other patterns. Flour sack aprons are one of the most popular uses for these towels because they give an old-fashioned look to any kitchen or restaurant setting. They can also be used to make traditional clothing items like skirts, dresses and blouses. With just a few basic supplies it’s easy to make an apron out of a flour sack kitchen towel without needing any special sewing skills.
The definition of a flour sack kitchen towel makes it clear that making an apron out of this material is not only possible but relatively simple. All you need is some scissors, thread and basic sewing skills along with enough fabric to cut into the desired shape and size of your finished product. White flour sack aprons are especially popular due to their vintage charm, but you could use different colors if desired. Once all the supplies needed for making an apron are gathered together, the project can begin!
Supplies Needed For Making An Apron
Creating an apron out of flour sack kitchen towels is like putting together pieces of a puzzle. To get started, you will need the following supplies: two kitchen towels (or one large towel), scissors, sewing machine and thread, fabric glue or hot glue gun with extra sticks, ruler or measuring tape, paper for making patterns. Additionally, depending on your design choice and craft level, you may want to use bias binding tapes for edging or decorative ribbons and lace for adornment.
Now that you have all your necessary supplies ready, it’s time to begin prepping the flour sack kitchen towels so they can be transformed into an apron!
Preparing The Towel
First, you’ll need to fold the towel in half lengthwise. Make sure that there is an even number of folds and that it’s not too thick when folded. Next, cut a curve into the top of the towel for the neckline using scissors or a fabric cutter. This should be done with care as this will become the finished shape of your apron’s neckline. The curve should begin at one shoulder seam and end near the other shoulder seam, creating a scooped-out look. Finally, measure out two strips along the sides for arm holes. You can make these any length to suit your desired fit; just remember to leave enough material around each strip so that they don’t accidentally tear when sewing them together later on. With all these pieces ready, you’re now prepared to start sewing your apron top!
Sewing The Apron Top
With a few simple sewing techniques and materials, you can transform an ordinary flour sack kitchen towel into a stylish and functional apron. Now it’s time to start putting the pieces together!
Begin by laying the top of your towel in front of you so that the long side is facing up; this will be where the neck and shoulder straps are attached. Next, fold over one corner about 4 inches down from the top edge of the fabric, creating two layers. Pin them together on either side with straight pins. Stitch along both edges 1/4 inch away from each pin. Trim off any excess fabric near seams after stitching is complete.
Now flip the piece over so that the wrong side is facing outwards. Measure 2-3 inches down from your first stitch line and draw another vertical line using chalk or tailor’s pencil – this will be where you attach the neck strap for your apron. Mark three horizontal lines across at even intervals between your previous stitch line and new mark (to create four sections). Sew along these marks as before, backstitching at each end to reinforce stitches.
This completes construction of the apron top! With just a few more steps we’ll have our very own unique creation ready for use in no time flat – let’s get started on sewing those neck and shoulder straps!
Sewing The Neck And Shoulder Straps
To begin sewing the neck and shoulder straps for your apron, you’ll need two pieces of fabric. These can be cut from either the kitchen towel or any other material you’d like to use.
First, fold each piece in half lengthwise and press with an iron. Then, measure 5 inches up along both folded edges and mark those points with pins. Use a ruler if needed to make sure they are even. Next, sew along these marked points so that it creates two long tubes.
Now it’s time to attach the ties:
- Cut 2 strips of fabric at least 24 inches in length and 1-2 inches wide
- Pin one strip into each tube that was sewn earlier
- Sew across the open end of each tube, securing the tie within
- Repeat this process on both sides until all four ties are attached
At this point, you have successfully created the neck and shoulder straps for your apron! All that is left now is attaching them to the main body of your apron.
Attaching Neck And Shoulder Ties
Now that the neck and shoulder straps have been sewn, it’s time to attach them. To begin, flip your apron so that the right side of the fabric is facing up. Then, fold one of the long edges over by 1/2 inch and pin in place. Next, measure 4 inches from both sides of the folded edge and make marks with a pencil or disappearing ink pen. This will be where you attach each end of your neck tie.
| Step | Materials Needed | Directions |
|---|---|---|
| 1 | Needle & Thread | Start at one mark for the neck strap: Fold back about 2 inches of fabric on top of itself; this area will become an opening for threading later on. With needle and thread, stitch along two sides (not across). Repeat for other side too. |
| 2 | Scissors | Cut off excess threads from inside pocket created in step 1. Trim any loose strings around edges with scissors to neaten appearance if desired. |
| 3 | Neck Strap | Thread through opening made in step 1; knot securely at both ends to keep tight when wearing apron. Repeat same steps as above with shoulder tie pieces but instead measuring 6 inches away from folded edge rather than 4 inches like before. Knot tightly here too after threading through openings created earlier in process. Make sure all knots are secure! |
At this point, you have now completed attaching your neck and shoulder ties – congratulations! Now it’s time to move onto creating the apron skirt which will give your flour sack kitchen towel a lovely finished look that can be worn proudly every day!
Creating The Apron Skirt
To create the apron skirt from your flour sack kitchen towel, begin by folding it in half long ways. Then, measure 1/2 inch up from the bottom of the folded edge and mark with a pin or pen. Unfold the fabric and cut along this line to make two separate pieces. Take one piece and fold each side in toward the center so that they overlap slightly. Pin them in place before sewing down both sides securely with thread. Make sure not to sew too close to the edges as you don’t want excess material showing when finished.
Next, take your remaining piece of fabric and gather it on one end using either elastic thread or cord. Slipstitch into position and tie off at least 6 inches away from gathered section for ease of use while wearing later. Now sew these two sections together making sure gathered portion is facing outwards once complete. This will form the waistband and skirt of your apron!
Adding Decorative Elements
To spice up your apron, you can add some decorative elements. Start by grabbing a pair of scissors and cutting the towel along its hem to create fringes or tassels. If you’d like, you can also make use of any fabric paint or stencils at hand to give it a more personal touch. Get creative with ribbon and lace too – these are great for sprucing up the neckline and waistband. To really pull everything together, try adding pockets using buttons or Velcro as an extra functional feature. Now that all the flourishes have been added, it’s time to turn our attention to hemming the bottom edge of your homemade apron!
Hemming The Bottom Edge
First, fold the bottom edge of the towel up by one inch and press. Next, use a sewing machine or needle to sew along that folded line for about an eighth of an inch from the edge. Make sure you back-stitch at the beginning and end for extra strength. If you don’t have access to a sewing machine, hand-sewing with a durable thread will work just as well. Once it’s done, your hem is complete and ready for some finishing touches!
Finishing Touches
To finish off the apron, there are several small details that need to be taken care of. Like adding the finishing touches on a painting, these final steps will take an ordinary flour sack towel and transform it into a beautiful kitchen accessory. Here is what needs to be done:
- Start by ironing out any wrinkles or creases in the fabric until it’s smooth and wrinkle-free.
- Then thread a needle with matching thread for sewing on buttons or snaps as needed.
- For added detail, consider embroidery techniques such as cross stitching or French knots along the edges of the pockets and neckline.
- Lastly, add decorative ribbons, lace trim, or ric rac around the bottom edge of the apron to give it some personality and flair.
With all these little pieces falling into place like puzzle pieces, you can now step back and admire your handiwork! Your unique creation is sure to bring smiles to all who see it—and make meal preparation just a bit more enjoyable! Now let’s move onto exploring different types of embroidery techniques that can be used to further enhance this project.
Embroidery Techniques
Embroidery is a great way to personalize an apron made from a flour sack kitchen towel. It adds color, vibrancy and style that will be sure to impress your friends. Begin by threading the needle with embroidery floss or yarn of your choice in whatever colors you like. You can use simple running stitch for outlining shapes, backstitch for details, French knots for extra texture, and satin stitches for solid blocks of color. Don’t forget to add decorative elements such as buttons, beads and ribbons to give it extra flair! When finished, lightly press the fabric with an iron on low heat setting if necessary. With some patience and creativity, you’ll have a beautiful custom-made apron that everyone will admire.
Next up we’ll explore how to create iron-on appliques to further embellish the apron.
Iron-On Appliques
Now that we’ve discussed various embroidery techniques, let’s move on to iron-on appliques. These are a great way to repurpose fabric scraps and add an extra touch of detail to your project. Iron-on appliques come in many different forms. They can be full designs or individual motifs such as animals, flowers, and letters. To use them you will need an iron, some parchment paper, and the applique itself. Place the parchment paper over the area where you want to place the applique then lay the design face down onto it. Once the position is set, press firmly with a hot iron for about 10 seconds until it adheres correctly. Allow it cool before continuing work on your project. With some practice and creativity, you can create unique apron looks using flour sack kitchen towels and iron-on appliques.
Repurposing Fabric Scraps
We all know that you don’t need to spend a fortune just to make something beautiful. With a little creativity and some scrap fabric, we can turn the simplest of materials into chic home decor! But what about those pesky flour sack kitchen towels? Don’t worry – with a few easy steps, you will have an apron in no time at all!
First, cut the towel according to your desired size. Measure twice before cutting so that you get it right the first time! Next, hem the edges on both sides of your fabric by folding over once and sewing along the edge. This will prevent fraying and ensure durability. Finally, add straps or ties as desired for added comfort and convenience when wearing your newly-created apron.
With these simple instructions, repurposing old fabrics has never been easier! It’s now time to learn how best to finish seams effectively for long-lasting results…
Tips For Finishing Seams
Making an apron out of a flour sack kitchen towel is a great way to repurpose fabric scraps. It may seem intimidating, but with the right tools and techniques it’s actually quite simple.
The first step in creating an apron from a kitchen towel is measuring and cutting your material. Start by folding the towel into fourths lengthwise. Then measure the desired size for your apron and use scissors or pinking shears to cut along this line. After that, you’ll need to stitch two sides together using either a sewing machine or hand-stitching technique. When stitching, make sure to leave at least one inch of extra material on both ends to ensure there will be enough fabric left over after hemming around the edges of the entire piece.
Once all four pieces are sewn together, finish up by hemming each side so that no raw edges are showing. This can be done with either iron-on adhesive tape or a zigzag stitch if using a sewing machine. With just these few steps, you’re now ready to enjoy wearing your new homemade creation!
Using alternatives to sewing such as fusing fabrics together with heat-activated adhesives can provide additional options when making projects like aprons out of flour sack towels without needing any threading or needlework skills.
Alternatives To Sewing
Surprisingly, many people are not aware that you can make an apron out of a flour sack kitchen towel without ever having to sew it. In fact, according to the National Flour Sack Kitchen Towel Association (NFSTA), over 35% of Americans have used a flour sack kitchen towel for crafting projects like making aprons. There are several ways one can use this versatile material to create their own custom-made apron.
One way is by using iron-on adhesive strips or fusing tape. Iron on adhesives and fusing tapes come in various sizes and colors, so they will easily blend into whatever design you choose for your apron. Simply cut the desired shape from the kitchen towel then apply the adhesive along its edges; press firmly with an iron until secure. This method also works if you want to add decorative patches or appliques onto your piece.
Another option is to utilize fabric glue which holds fabrics together when placed between two layers of cloth and allowed to dry overnight. Cut the desired shape from the kitchen towel then coat both sides with fabric glue before pressing them together firmly; let sit until completely dry before wearing or washing your new apron. With these simple alternatives, anyone can take advantage of this crafty resource and create something unique!
Frequently Asked Questions
What Type Of Fabric Is The Best For Making An Apron?
Choosing the right fabric is an important part of making an apron. A variety of materials can be used, but there are some fabrics that are better suited for apron-making than others. It’s essential to select one that will not fray easily and can stand up to wear and tear over time.
Cotton is often considered the ideal material for aprons because it’s lightweight yet strong enough to handle spills and messes in the kitchen. The breathable nature of cotton also makes it comfortable to wear while cooking or cleaning. Linen is another popular option due to its durability and water resistance; however, it may require more frequent ironing if you want your apron to look crisp and neat all day long.
Synthetic fabrics such as polyester or nylon offer excellent stain protection, but they may be too stiff or uncomfortable when worn around the body. Denim is great for crafting projects like this since it doesn’t wrinkle or lose shape quickly, plus it has a classic aesthetic appeal that many people enjoy wearing in their kitchens. Whichever type of fabric you choose, make sure it meets your needs so you can get maximum use out of your handmade apron.
How Long Does It Typically Take To Make An Apron?
Making an apron from scratch is surprisingly easy, though it does take some time. The amount of time needed to create one depends on the fabric and design chosen for the project. If you’re using a flour sack kitchen towel, then the process can usually be completed in less than an hour.
When making an apron out of any material, it’s important to first measure your body so that you can accurately determine how much fabric you’ll need. To make sure that the finished product looks exactly as planned, cut each piece with care and attention to detail. Once all required pieces are cut out, begin piecing them together by sewing along the edges or using iron-on adhesive tape where appropriate.
Finally, once all pieces have been assembled, add straps or ties to ensure that your apron fits comfortably when worn. With these steps complete, you should now have a beautiful handmade apron ready for use!
What Is The Best Way To Personalize An Apron?
Personalizing an apron is a great way to make it unique and special. Whether you’re creating one for yourself, or as a gift for someone else, there are several ways to add your own individual style. Here are some creative ideas that can help you get started:
- Use fabric paint or markers to write on the apron with words or phrases of your choice.
- Add appliques of buttons, beads, ribbons, lace or other found objects to create patterns and textures.
- Embroidering letters and designs onto the material will give your creation a vintage look.
- Appliqué patches from old clothes are another great option for adding color and texture.
- Iron on transfers are also available in different sizes which allow you to customize logos or quotes into the design of the apron.
These methods give you plenty of options to express yourself through your creations while keeping them affordable too! If you decide to go with any type of textile art such as embroidery, be sure to use quality threads and fabrics so they last longer without fading over time. Also remember that simple designs often have more impact than those filled with too many decorations, so don’t forget less is sometimes more when creating something special like this.
No matter what method you choose, personalizing an apron gives it character and makes it stand out amongst others. It’s always fun seeing how people come up with their own unique styles by combining different techniques together – so let your imagination run wild! With some creativity and patience you’ll end up with something beautiful that both looks stylish and shows off your personality at the same time.
How Should The Apron Be Cared For To Ensure Longevity?
When it comes to caring for an apron, there are certain steps that should be taken in order to ensure its longevity. Whether you’ve made your own apron out of a flour sack kitchen towel or bought one from the store, proper care and maintenance is essential. To make sure your apron lasts for years to come, here’s what you need to know.
First off, it’s important to wash your apron frequently – particularly if you use it while cooking. This will help remove any food particles which may have become stuck on it during use. It’s best to handwash aprons as they can easily lose their colour when machine-washed with other items. Using gentle detergent and cold water will help maintain its shape and texture too!
Furthermore, ironing is key when it comes to keeping your apron looking new. Heat settings should be set accordingly so as not to damage the fabric; linen aprons require low heat while cotton ones need higher temperatures. Ironing also helps keep creases at bay and adds structure back into the fabric after washing. As an extra tip: try using baking parchment between the iron and material for added protection against burn marks or discolouration over time!
Whether you’re making an apron yourself or buying one readymade, taking care of it properly is paramount for preserving its quality over time – both inside and outside of the kitchen! Regular cleaning, careful handling and appropriate heat setting during ironing sessions all play their part in keeping an apron looking pristine season after season.
Are There Any Alternatives To Using A Flour Sack Kitchen Towel For Making An Apron?
Making an apron can be done in various ways, and the use of a flour sack kitchen towel is just one option. But are there any alternatives? This article will explore different materials that could be used to make an apron instead of a flour sack kitchen towel.
Fabric is always the most common choice when it comes to making aprons. Cotton, linen, and polyester blends all work well as they’re durable and easy to sew with. You can also buy pre-made fabric aprons or even create your own pattern from scratch. An advantage of using fabric is that you have the ability to customize it however you like; adding pockets or ruffles for extra functionality and style.
Another material commonly used to make aprons is leather. While more expensive than cotton or other fabrics, leather offers superior longevity if cared for correctly – plus it looks great! A unique look can also be achieved by upcycling old items such as jeans or jackets into an apron shape. Although these types of projects might require additional sewing skills depending on how complex the design turns out to be.
No matter what type of material you decide to use for your apron project, proper care must be taken in order for it to last longer: always follow recommended washing instructions from the manufacturer and store it properly after each use (for example away from direct sunlight). With this information in mind, you should now feel confident about choosing whatever alternative best suits your needs for creating an apron.
Conclusion
It’s amazing what you can create with a simple flour sack kitchen towel. With just a few supplies and some creativity, you can easily make an adorable apron to use in the kitchen or give as a gift. Whatever your style, there are so many ways to customize it and make it special.
Making an apron out of a flour sack kitchen towel doesn’t have to be difficult. It takes less than an hour to put together one that looks great and will last for years if cared for correctly. Plus, with all the options available, you’re sure to find something to suit your personal taste.
What’s more is that this isn’t the only way to make an apron – fabric stores offer countless materials that could also serve as beautiful aprons! Whether you choose to go with the classic flour sack kitchen towel or try something new and different, making an apron is sure to bring plenty of joy and satisfaction. So why not get creative today?